Table of contents
- Start Your Messaging Registration First
- Sign Up And Onboarding
- The Setup Order That Saves You A Week
- Web App Vs Mobile App
- Running A Job From Start To Finish
- Jobs And Invoices Are Two Different Things
- Estimates
- Moving Your Data From Another Platform
- Employees, Subcontractors, And The Time Clock
- Online Booking And The Contact Form
- Messages, Phone Numbers, And Call Tracking
- Marketing Tools And Integrations
- Review Guard
- Reports, And Why Tags Matter
- Andrew's Rules Of Thumb
- Where To Get Help
- Watch The Full Walkthrough
Andrew sat down and recorded every screen in Autopilot in one sitting, from the signup page to canceling your account. It runs three hours and eleven minutes. This is the written version of it.
Read it straight through if you are setting up a new account. Jump to a section if you are stuck on one thing. Timestamps point back to the video when you would rather watch someone click the buttons.
One note before you start. The video was recorded a while back, and a few things Andrew calls "coming soon" in it have since shipped, including GPS tracking, Tap to Pay, and the AI receptionist. See all features for what is live today.
Start Your Messaging Registration First
Everything else on this page you can do in an afternoon. This one has a clock on it, so start it today and do the rest while it processes.
A2P 10DLC stands for application to person 10 digit long code. It is a carrier regulation, not an Autopilot rule, and every platform has to follow it. Jobber, Housecall Pro, and Workiz all put you through the same thing. Until you clear it, Autopilot cannot send text messages from your own number.
Two things get people declined, and both are avoidable:
Your business name has to match your IRS paperwork exactly. Letter for letter, comma for comma. If the CP575 form the IRS sent you says "Jedi Junk Removal" with no LLC on the end, that is what goes in the field, even if your bank and your state filing both say LLC. Dig up that PDF before you start. You got it the moment you registered your EIN.
Your website has to match the business name. If your EIN says Solutions Inc and your website says Jedi Junk Removal, expect a fight. A registered DBA document fixes it. So does pulling a fresh EIN under the right name, which takes a couple of minutes and costs nothing.
Put CEO in both the title and the job position fields unless you declared something else. Register on a computer; the mobile app will send you to the desktop anyway.
You have to be on a paid subscription to apply, because the phone infrastructure costs real money to provision. So test the platform on your free trial first, then subscribe, then register.
Approval usually takes two to three weeks. If everything lines up it can land in under a week.
Here is the part most people miss. The minute you submit, Autopilot opens a temporary window so you can create a phone number and start using it. That number will ring, you can make calls on it, and you can receive texts on it. Only outbound texting stays locked until the registration clears. The red banner turns yellow while it is pending and disappears when you are approved.
Video: 6:21
Sign Up And Onboarding
Use your real information. Your phone number and email are how you get notified when a customer texts you.
You need a street address to finish signup. If you work out of your house, use your house. You can hide it from your invoices later. It has nothing to do with your Google Business Profile.
Two onboarding questions matter:
- Automated text notifications: say yes. You can rewrite every message later.
- Preload junk removal job types, lead sources, and pricebook items: say yes if you do junk removal. You get Andrew's own pricing sheet as a starting point, and editing prices is faster than building the whole thing from scratch. If you are in another trade, skip it and build your own.
Skip everything else for now. You will do it properly in the next section.
Video: 2:37
The Setup Order That Saves You A Week
Do this on a computer. Every platform is like this: the phone is for the field, the desktop is for setup.
1. Register your first phone number. Call it "main" or "primary." This is the line your automated texts go out from and your general business number. Turn on the whisper message and call recording.
Pick "ring in Autopilot using VoIP" over plain call forwarding. VoIP unlocks missed call SMS auto reply, call recording, no answer forwarding to a second person, and picking which employees ring. Plain forwarding just rings your cell.
One oddity: custom voicemail greetings have to be recorded on the mobile app, under Settings then Phone Settings. It is the only setting that lives on the phone and not the web. Record it there, then select it on the website when you configure the number.
2. Customize your text notifications. Once your number exists and you are approved, rewrite every message: job scheduled, job updated, on my way, job completed, job canceled.
The job completed message is the one that makes you money. That is where your Google review link goes. Write it the way you actually talk. Andrew's line was some version of "I just finished your job, it would mean a lot to me and my family," and it pulled reviews far better than anything generic. Grab your review link from your Google Business Profile under "Ask for reviews," or use the free review link generator.
Write a decent canceled message too. Telling somebody "no hard feelings, reach out if you change your mind" is part of the customer experience.
3. Build your pricebook. Categories first, then items. Andrew ran four categories at Jedi Junk Removal: junk removal, dumpster rentals, overages and fees, and demolition. Under junk removal he had twelve price points, from a single item up through a full load.
The overages category is where the money hides. His heavy item fee was $50 per quarter load. A full truck of construction debris meant adding that item four times. A quarter of a load of heavy stuff meant adding it once.
Item descriptions carry through to the invoice, so write them once and stop retyping.
4. Company settings. Logo and brand color, because both show up on your invoice PDF. Your terms of service goes here too and becomes a clickable link on the invoice.
Set your time zone and get it right. It governs booking, so a customer in New York scheduling for their cousin in California still lands on the correct slot on your calendar.
Note your Company ID while you are in there. Support asks for it, and it saves five minutes on every ticket.
5. Invoice, tip, and tax settings. Decide what shows on the invoice and whether you collect signatures. Turn on payment acceptance if you want customers paying by card.
For tips, Andrew runs 15, 20, and 25 percent with 25 preselected. Whether that is too aggressive is your call, but turning tips off entirely leaves money on the table.
Taxes work differently than people expect. Most states do not charge sales tax on services, only on materials. Autopilot will not stack multiple tax rates on one item, so if you want to charge sales tax and a card processing fee together, build one combined rate. Card processing runs 2.9 percent, which is the processor's number, not a markup.
Two more things. A tax rate only applies to items marked taxable, which is how a contractor taxes the lumber and not the labor. And Andrew keeps a custom rate called "no tax discount" set to zero, so the customer sees a discount line on an invoice that was never going to be taxed anyway.
6. Job settings. Default job duration and default arrival window.
He runs a one hour default duration and stretches the block after the job if it ran long. A two hour arrival window is right for Los Angeles traffic; an hour is plenty in most places. The arrival window is what fills in the "we will arrive between 9 and 11" line in the scheduled text, and it is the cheapest way to stop being late.
7. Lead sources and job types. Both are preloaded and both are yours to edit.
Mark every lead source paid or organic. That single flag is what powers the organic versus paid breakdown on your dashboard. Add anything missing: radio ads, door hangers, business walk-ins, a specific promo flyer. Repeat customers are tracked automatically, so you do not need a lead source for those.
Job types are how you find out where your money actually comes from. When you are new you take everything, so keep single items, moving, labor only, junk removal, demo, delivery and pickup separate. A year later you pull a report and see exactly which of those was worth doing.
8. Connect Stripe. Settings, then Integrations. Ten minutes of business and bank details. Next day deposits kick in after a week or two of history. Your customers never see Stripe; the invoice is from your company.
Video: 13:07
Web App Vs Mobile App
Same account, different jobs.
The web app has all the settings, all the reports, the marketing tools, client and job import and export, tag filtering, and pagination. The mobile app has everything you need standing in somebody's driveway: schedule, map, jobs, clients, invoices, estimates, messages, phone, time clock.
Use the phone during the day. Sit down at the computer at night.
Video: 27:11
Running A Job From Start To Finish
This is the loop you repeat every day.
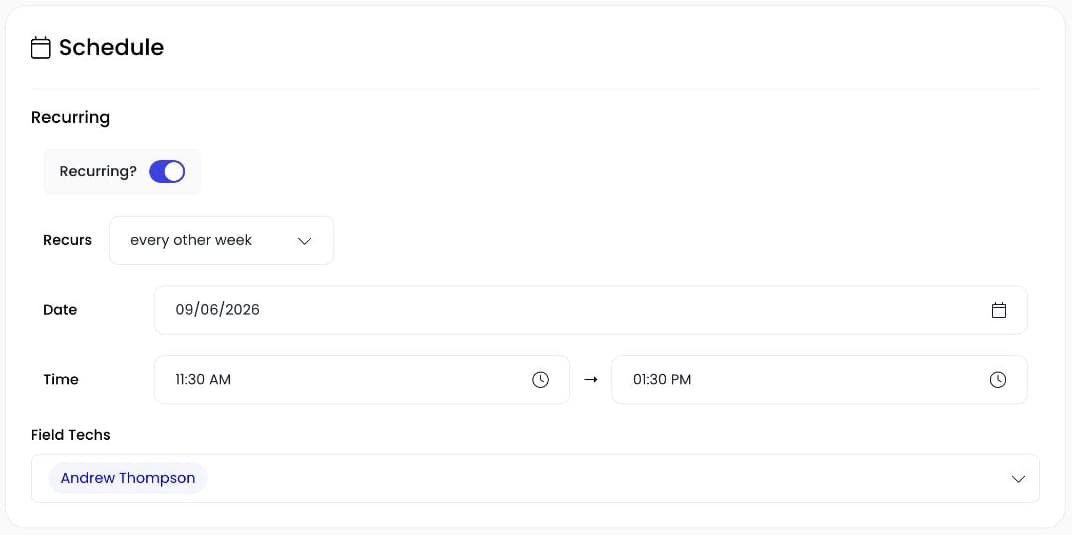
Create the job. Andrew's preferred method is week view on the schedule, tap the slot you want. You can also use the plus button from anywhere, the jobs list, or day view. Creating the job creates the client at the same time, so do not make the client first.
Fill in lead source and job type while you are there. Add tags for anything you might want to count later: which truck ran it, whether it needed a skid steer, whether it was a realtor referral.
Private notes are internal to you and your crew. Gate codes, "customer will not be there," "collect payment before leaving." Job photos are internal too. Take before and after shots on every job. A year from now when somebody files a chargeback, those photos plus the signature and the timestamps are your evidence. You can attach PDFs as well, which is where a signed custom contract lives.
Add the items. Items are the shopping cart. They are what you are billing for. Pull from your pricebook, or create a custom item on the spot, or pull a pricebook item and adjust its price and description without changing the pricebook.
Mark it complete. That fires the completed text with your review link in it. When you already know the customer is unhappy, switch off "send completed SMS" on that job before you finish it. That is how you avoid inviting a one star review.
Log the payment. Items and payments are separate on purpose. Once a job is complete, the amount counts as a sale whether or not you have the money. Until you log the payment it also sits in "payments due."
Split payments work. So do cash, check, offline card readers, and cards taken through Stripe. Log the tip even on cash and checks; there is a tip report waiting for you at the end of the year.
Skipping this step is the single most common mistake. Your average job size stays at zero no matter how much you actually made.
Video: 36:52
Jobs And Invoices Are Two Different Things
Jobs are internal. Invoices are what the customer sees. Understanding how they connect saves a lot of confusion.
Create the invoice from the job, using the three dot menu. Once linked, the two stay in sync permanently. Add a hot tub to the job and it appears on the invoice. Log a payment on the invoice and it appears on the job. It does not matter which side you touch.
A standalone invoice with no job attached is a different animal. It adds to your sales but not to your job count, so it never moves your average job size. Use it when you are billing for something genuinely separate from a job, like materials you ordered. If you just forgot to charge for something, add it to the existing job instead.
Made an invoice and forgot the job? Three dot menu, "connect to job." It only offers jobs belonging to that client. If both sides have items, it asks which one is the source of truth.
For terms, set the due date. Thirty days out is your net 30.
What the customer gets: a text with a link, an email with the PDF, or both. The link opens a web version where they can sign with a finger, add a tip, and pay by card, Apple Pay, Google Pay, or bank transfer. Card payment needs the number, expiration, and zip code. No address, no account.
Video: 1:04:20
Estimates
Estimates work like jobs, minus the calendar slot.
Estimate notes are public, so that is where you sell. Add line items, break the price down as far as you want, attach photos, and apply a discount if you are trying to close. A senior discount line on a ten thousand dollar hoarder cleanout does real work.
Send by text, email, or both. The customer sees the estimate on their phone, can print or download the PDF, signs, and hits approve or decline. Your dashboard tracks the win rate.
Once approved, one more step: create job from estimate. It carries the client details, the items, the private notes, the estimate notes, and the photos onto the calendar. You pick the date and time.
Video: 1:17:16
Moving Your Data From Another Platform
Import your clients first. Then import your jobs. Do it in that order.
If you import jobs first, Autopilot creates client records to hang them on, but those records have nothing in them. No address, no email. Import clients first and the jobs attach themselves to the full records you already have.
Export from your old platform (in Workiz the clients page has an export button; Jobber and Housecall Pro are similar), then use the import button in Autopilot. It auto maps your CSV columns to Autopilot fields based on which platform you pick, and you can fix anything it got wrong. Address handling differs by platform: Workiz puts the whole address in one column, Housecall Pro splits it into street, city, state, and zip. Pick the matching option.
Tag everything you import with something like "from workiz." Later, when you are running marketing to a specific group, you will be glad you know which records came from where.
Two honest limits. Import leads as a separate CSV so you can market to them differently than clients. And line items do not survive the trip; historical jobs come in with a generic item and the correct total. You get the job history and the dollar amounts, not a perfect copy. Message support if you need a hand moving deeper history.
Export works the same way in reverse. One button, one CSV.
Video: 47:00 and 59:50
Employees, Subcontractors, And The Time Clock
Two kinds of people, and picking the wrong one causes headaches.
Employees get a login. Set the role to technician and they see their own schedule and their own numbers, not company revenue, and they cannot delete anything. Set it to admin and they get everything you have, which is what you want for a spouse or a partner. "Assignable to jobs" set to no makes them office staff, in the system but not on the calendar.
Subcontractors get no login at all. They get text messages when you assign them a job, update it, or cancel it, and those texts include the private notes. Use this for the cleaner you call twice a month or the hauler who helps on big days.
Now the part that causes the most support tickets. Your employee must sign up through the invite link you send them. Do not let them download the app and register on their own; that creates a brand new company and none of your data will be there. Create the employee in Autopilot, they get a text with a link, they click it, the form prepopulates, they set a password. The app comes after that.
When somebody leaves, they become a former employee rather than disappearing. Their time cards survive, which matters the day a labor question comes up. You can reinvite them if they come back.
Time clock. Everyone clocks in from the app, including you. Track your own hours; the tech report shows revenue per hour and it is a genuinely uncomfortable number in a useful way.
Employees cannot edit their own time cards. You edit them, and only on the website. They will forget to clock in, they will leave themselves clocked in for thirty two hours straight, and you will fix it. That is the job.
Video: 1:26:38
Online Booking And The Contact Form
You can send customers straight to your booking page, or embed the form inside your own site. The three dot menu gives you the embed code, which is a plain iframe that drops into an HTML block on WordPress, Wix, Squarespace, Webflow, or Duda.
Turn on "hide header" when you embed. Your company name and logo are already at the top of your own website, and on a phone that duplicate header eats the whole screen.
The settings worth thinking about:
- Required fields. Fewer fields means more bookings. Andrew did not require email or photos, but he did require last name, because a system full of Andrews with no surnames gets old fast.
- Auto confirm or pending. Auto confirm drops the job straight onto your calendar. Leave it off and bookings show up orange and do not block the slot until you approve them. Andrew prefers auto confirm and calls the customer right away.
- Double booking. He leaves it on and sorts conflicts out by phone, on the theory that a booked calendar beats a clean one.
- Minimum notice. If you can be there in an hour, let them book an hour out.
- Arrival window and job duration. Same numbers as your job settings.
- Lead source. Set it to online booking and mark that source organic. You genuinely do not know if they came from a Google ad they saw last week or their neighbor, so track it as organic and correct it when you ask them on the phone.
Here is the trick worth stealing. The word "job" is intimidating to somebody who has never priced junk removal. Andrew's booking form offered "schedule a free on-site estimate, no obligation" instead. It lands on his calendar either way, and he closed roughly nine out of ten on site.
You can also put pricebook items on the form, grouped by category, and require payment upfront on specific items. That is how you take a dumpster deposit at booking while leaving your junk removal items as pay later.
Separately, there is a contact form you can embed. It captures a name and a message and drops the person in as a lead with an instant notification, without asking them to pick a time slot. Run both. Book Now for people ready to buy, contact form for people with a question. See online booking and the lead capture form.
Video: 1:39:01
Messages, Phone Numbers, And Call Tracking
Call tracking is the feature most owners underuse, and it is the one that tells you where to spend money.
Create a separate number for each thing you want to measure: yard signs, door hangers, Google Ads, the truck wrap, a radio spot. Every number forwards wherever you want. The call report then shows which ones actually ring.
Every one of those numbers feeds a single unified inbox. Reply and the conversation goes back out from the number they contacted, so the yard sign number stays the yard sign number. That is the piece other platforms make you fight.
A few things worth knowing:
- You can text a phone number that is not in your system yet. Most platforms make you create a client first.
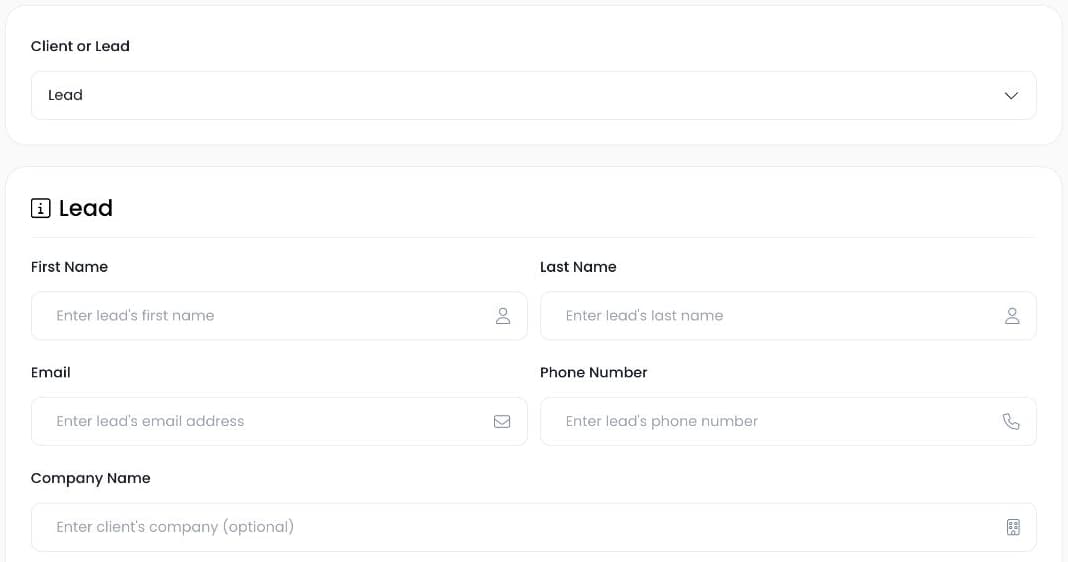
- From a text thread you can save the person as a client or lead, then create a job, and it fills in their details.
- Automated messages show in a different color than messages you typed.
- Each thread shows the customer's map view, street view, upcoming job, and past jobs.
- Per client you can set Receive SMS, No Marketing SMS (transactional only), or Do Not Disturb. There is also a "do not service" flag for customers you would rather not see again.
- Minimum inbound call duration defaults to 10 seconds, so a spam call you hang up on does not drag down your booking rate.
- If your number starts showing as "scam likely," phone settings has a button that files the correction.
More detail on call tracking and the built-in phone.
Video: 1:51:00
Marketing Tools And Integrations
All of these live on the web app.
Sequences are tag triggered. Tag a client "review follow-up" and they get a series of texts over the next week or two. Tag a lead "lead follow-up" and they get worked for a month, or a year, however you build it. Set it up once and it runs.
SMS blast and email blast go out to clients, leads, or a filtered slice by tag. The email side has a drag and drop builder for images, headers, and buttons.
Google Ads. Connect the account, fetch your campaigns, pick the ones that matter, and map them to your Google Ads lead source. It syncs at 11:59 every night and reports ad spend, revenue attributed to ads, and customer acquisition cost. That only works if you are marking lead sources on jobs.
QuickBooks. Connect, choose whether to sync your existing invoices, and every invoice from then on flows across automatically.
Zapier. New client is the live trigger today, covering both clients and leads, which is enough to push new customers into Google Sheets, a spreadsheet, or another system.
Video: 1:55:33
Review Guard
Review Guard sits between the customer and Google.
Set your minimum star rating. Four is the normal choice. A customer who taps four or five stars goes straight to your Google review page. A customer who taps three or lower goes to a private feedback form instead, and that feedback is texted and emailed to you.
You get the complaint. Google does not.
Setting it up takes two steps. Paste your Google review link into review settings, save, and copy the Review Guard URL it generates. Then paste that URL into your job completed message under SMS notifications, replacing the plain Google link.
Save the Review Guard link in your phone notes too. It is the link you hand out any time somebody offers to leave you a review.
More on the review funnel.
Video: 2:02:15
Reports, And Why Tags Matter
The reports are only as good as the data you put in, which is the whole argument for marking lead source and job type on every job.
What is in there: sales, lead source, repeat customers, highest paying customers, call reports, time clock by employee, and tech reports showing revenue per hour.
Tags are the flexible part. Tag jobs by truck and you can total up what truck one earned. Tag by equipment and you can count how many jobs needed the skid steer before you decide whether to buy a second one. Tag clients as realtors or property managers and you can both report on them and blast them separately.
You can mass add tags to jobs or clients from the list view, up to a hundred rows at a time. Going back and tagging a year of history takes about ten minutes.
Video: 3:07:14
Andrew's Rules Of Thumb
The advice scattered through three hours of video, in one place:
- Start the A2P registration today. It is the only thing here with a waiting period.
- Do setup on a computer. The phone is for the field.
- Import clients before jobs. Backwards leaves you with empty client records.
- Every job gets a lead source and a job type. Your entire dashboard depends on it.
- Mark it complete, add the items, log the payment. Skip any one and your numbers lie to you.
- Invoice from the job, not on its own, unless there is a specific reason.
- Cancel the jobs that actually canceled. An honest cancellation rate is something you can improve. A flattering one is not.
- Route every call through a tracking number. Otherwise you are guessing about where your work comes from.
- Take before and after photos on every job. They cost nothing until the day they save you thousands.
- Write the job completed text like a person. It is the one message that reliably turns finished jobs into Google reviews.
Where To Get Help
Fastest answer is Wally, the AI assistant built into the app. On the mobile app, open the side menu and tap Support. On the website, click the blue bubble in the bottom right. Both hand off to live chat with the team if Wally cannot sort it out.
Free onboarding is real, and so are live demos. Book a demo if you want Andrew to walk your account with you.
Everything else is in the training video library, which covers each of these topics in its own short video.
Watch The Full Walkthrough
Everything above, demonstrated on screen. The video is chaptered, so you can jump to whichever section you are stuck on.
Find more Autopilot guides on Google
Add Autopilot as a preferred source to see more of our latest advice in Google Search and AI results.