
You can talk to the founder.
Ryan did. Here is part of our conversation.
December 29 and 30, 2025 · Selected support messages
Ryan · Customer
Hey Andrew, thanks for the reply! Just to be clear, was tap to pay a feature coming later? Or were you talking about the inventory feature or zapier?

Andrew · Founder
Zapier is something we’re planning to add soon. That said, since we already support multiple payment options, could you let us know which tap-to-pay process you’re looking for?
Selected excerpts from our support archive, with wording preserved and intervening text omitted. Presented here as a chat excerpt. Ryan's surname and photo are kept private. The replies describe the product at the time; the walkthrough below shows what changed.
Table of contents
Tap to Pay in the Autopilot mobile app lets you accept a contactless card or supported phone wallet on a compatible phone. Payments use your connected Stripe account. Set up the device before you arrive at a job where you expect to use it.
Ryan asked about Tap to Pay while looking at Autopilot for his business. Our conversation mixed that question with other requests, and he had to ask which feature I meant. This guide keeps the payment workflow separate from those other questions.
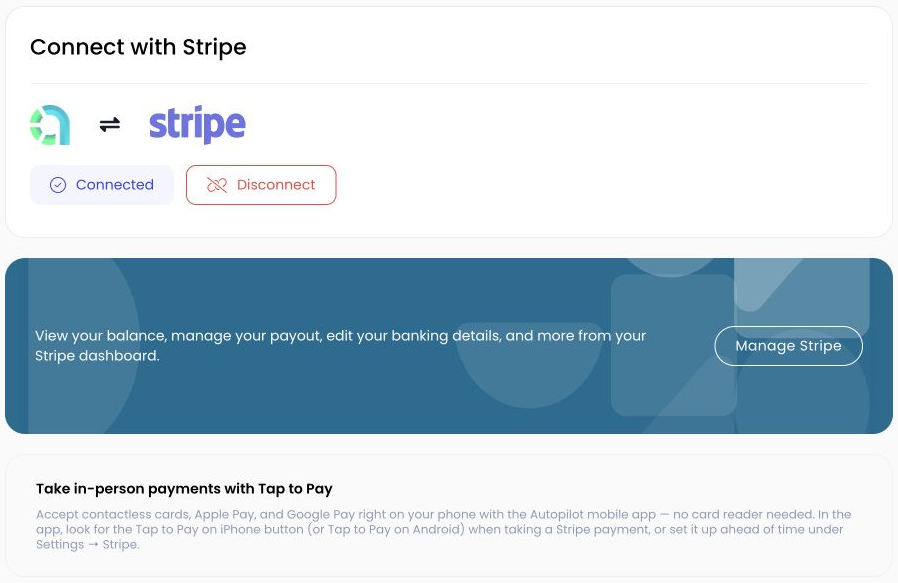
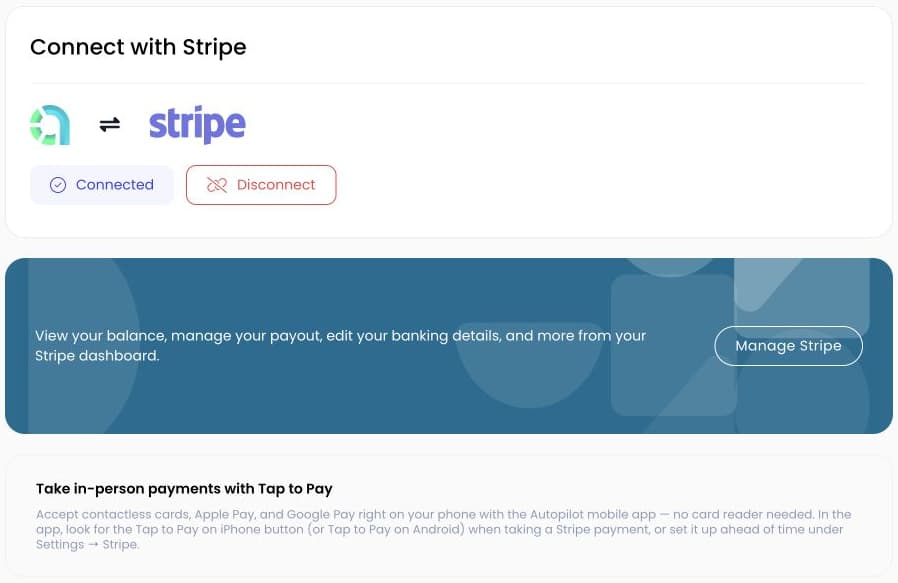
The actual web settings show the connected Stripe account and explain where to find Tap to Pay. Device setup and card collection happen in the Autopilot mobile app.
What Tap to Pay means here
There are two phones you might be talking about. Your customer's phone can hold a wallet such as Apple Pay or Google Pay. Your phone runs Autopilot and receives the contactless payment. A supported contactless card can also be tapped against your phone.
That differs from typing a card number manually or connecting a separate card reader. Autopilot has multiple payment paths, so choose the method you intend to use at checkout.
Stripe's Tap to Pay device requirements describe supported hardware, operating systems, and regions. Compatibility changes, so use those requirements and the readiness message in the app rather than assuming any phone will work.
Connect Stripe before taking a payment
Check that your business has a connected Stripe account ready to process payments. In the mobile app, open Settings, then Stripe, and look for the Tap to Pay setup screen.
The app checks whether your phone is supported and whether Stripe is connected. If either is missing, it shows that requirement before setup. Complete the relevant account steps before handing the phone to a customer.
Initial setup may also require an authorized owner or admin to accept the payment terms. A field employee who cannot complete that step should ask the account owner to handle setup, rather than repeatedly trying to start a payment.
Set up the phone you will use
Choose Set Up Tap to Pay when the option is available. On iPhone, the label is Tap to Pay on iPhone. Follow the setup and education prompts on that device.
Wait for the ready state. The settings screen tells you when Tap to Pay is set up and explains that you should choose Stripe when taking a payment, then use the Tap to Pay button.
Do this before your first checkout in the field. A customer standing beside a finished job is a poor time to discover that the phone needs an update or the business has not completed setup.
Collect payment against the right work
Open the job or invoice you are collecting for and review the amount. Check whether there is already a payment or deposit recorded so you know the remaining balance.
Choose Stripe as the payment method, then the Tap to Pay option. Follow the phone's contactless collection instructions. Let the customer present their card or wallet when the payment screen is ready.
Wait for the final result before treating the invoice as paid. A card being presented is only part of the process. Check that the app confirms the payment and that the amount appears against the intended work record.
If the result is unclear, inspect the payment record before attempting another charge. Avoid charging twice because a screen took longer than expected to update.
If the phone is not ready
Read the status message on the Tap to Pay settings screen. It distinguishes missing Stripe setup, unsupported devices, and setup still in progress. On Android, NFC and device configuration can also affect availability.
Use the app's instructions for the specific condition it reports. If the phone cannot use Tap to Pay, review another supported payment method, such as a card reader, rather than assuming changing the amount will solve it.
Processing rates depend on your payment arrangement and method. Check the current fees in your Stripe and Autopilot account information. The old conversation is not a current price quote, and this guide does not promise a particular processing rate.
Check setup before the next job
Open the mobile Stripe settings on the phone your crew will carry. Confirm that the connected account is correct and that Tap to Pay reports ready. Use the built-in Learn section to see how collection works.
The Tap to Pay page covers the feature, and a demo can help you check how it fits your existing checkout process. Bring the phone you plan to use so the device requirements are part of that conversation.
Find more Autopilot guides on Google
Add Autopilot as a preferred source to see more of our latest advice in Google Search and AI results.